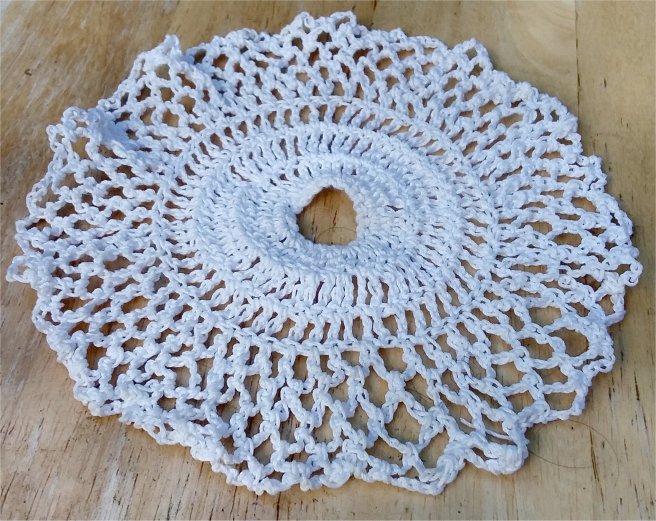
All Stuck Up! Pincushion Pattern

Click to go to pdf file.

Materials: Clark’s O.N.T. or J. & P. Coats Pearl Cotton, size 5, 1 ball of Green and 1 ball of any contrasting color.

SIZE  5 Pearl/e CYC 1 UK 2ply Australia 3 ply

Dmc Michaels lists twenty-four colors.

Clark’s O.N.T. or J. &. P. Coats Six Strand, 1 skein of Red. (Any embroidery thread should work.)
Milward’s steel crochet hook No. 7. (I would use a 6 (1.75mm)

Pattern in US Terms.

Cactus. Large Piece … Starting at tip, with Green ch 2. 

1st rnd: 8 sc in 2nd ch from hook. 

2nd rnd: 2 sc in each sc. 3rd and 4th rnds: Sc in each sc. 

5th rnd: * Sc in next sc, 2 sc in next sc. Repeat from * around (24 sc). 

6th, 7th and 8th rnds: Repeat 3rd rnd. 

9th rnd: * Sc in next 2 sc, 2 sc in next sc. Repeat from * around (32 sc). Repeat 3rd rnd until piece measures 3 inches from tip. Fasten off.

Small Pieces (Make 3) … With Green, work 1st, 2nd and 3rd rnds as for large piece. T

hen repeat 3rd rnd until piece measures 1 inch from tip. Fasten off.

Flower Pot. Bottom … With contrasting color, ch 2. 

1st and 2nd rnds: Same as for large piece. 

3rd rnd: Same as 5th rnd of large piece. 

4th rnd: Sc in each sc.

Repeat 4th rnd, increasing as necessary to keep work flat, until piece measures 1¾ inches in diameter.

Fasten off.

Using Green, make another piece same as this for top.

Side Piece … Starting at short edge, with contrasting color ch 18. 

1st row: Sc in 2nd ch from hook, sc in each ch across. Ch 1, turn. 

2nd row: Sc in each sc.

Ch 1, turn. Repeat 2nd row until piece measurescircumference of bottom.

Fasten off.

Sew short edges of side piece together, forming a ring.

Sew one edge of ring to edge of bottom, forming flower pot.

Work 3 rnds of sc around other edge.

With Red Six Strand * work sc in each of  2 sc, sc in 2nd row from edge (a long sc).

Repeat from * around.

Fasten off.

Slip cardboard base of a ball of Pearl Cotton inside flower pot, and fill with scraps of wool.

Stuff cactus pieces firmly with wool.

Sew small pieces to large piece at desired angles.

Sew base of large piece securely to Green top, being sure there is enough wool inside cactus to hold it upright.

Fit top onto flower pot, and sew to edge of side piece, having turned down the last 4 rnds of sc as a decorative rim on flower pot.

Pattern in UK terms.

Cactus. Large Piece … Starting at tip, with Green ch 2. 

1st rnd: 8 dc in 2nd ch from hook. 

2nd rnd: 2 dc in each dc. 3rd and 4th rnds: Dc in each dc. 

5th rnd: * Dc in next dc, 2 dc in next dc. Repeat from * around (24 dc). 

6th, 7th and 8th rnds: Repeat 3rd rnd. 

9th rnd: * Dc in next 2 dc, 2 dc in next dc. Repeat from * around (32 dc). Repeat 3rd rnd until piece measures 3 inches from tip. Fasten off.

Small Pieces (Make 3) … With Green, work 1st, 2nd and 3rd rnds as for large piece. T

hen repeat 3rd rnd until piece measures 1 inch from tip. Fasten off.

Flower Pot. Bottom … With contrasting color, ch 2. 

1st and 2nd rnds: Same as for large piece. 

3rd rnd: Same as 5th rnd of large piece. 

4th rnd: Dc in each dc.

Repeat 4th rnd, increasing as necessary to keep work flat, until piece measures 1¾ inches in diameter.

Fasten off.

Using Green, make another piece same as this for top.

Side Piece … Starting at short edge, with contrasting color ch 18. 

1st row: Dc in 2nd ch from hook, dc in each ch across. Ch 1, turn. 

2nd row: Dc in each dc.

Ch 1, turn. Repeat 2nd row until piece measurescircumference of bottom.

Fasten off.

Sew short edges of side piece together, forming a ring.

Sew one edge of ring to edge of bottom, forming flower pot.

Work 3 rnds of dc around other edge.

With Red Six Strand * work dc in each of  2 dc, dc in 2nd row from edge (a long dc).

Repeat from * around.

Fasten off.

Slip cardboard base of a ball of Pearl Cotton inside flower pot, and fill with scraps of wool.

Stuff cactus pieces firmly with wool.

Sew small pieces to large piece at desired angles.

Sew base of large piece securely to Green top, being sure there is enough wool inside cactus to hold it upright.

Fit top onto flower pot, and sew to edge of side piece, having turned down the last 4 rnds of dc as a decorative rim on flower pot.

Lamb Toy Pattern

Click to go to pdf file.

LAMB TOY

MATERIALS
BERNAT Luxor (1 oz. skein) — 9 This was a rug yarn that used a size G (4.00mm) crochet hook  gauge 3sc inch (2.54 cm) 2 rows to the inch (2.54cm)
1 Styrofoam ball No. 5
1 package BERNAT felt pieces
Cotton batting
Satin ribbon
Matching sewing thread

ANIMAL GENERAL DIRECTIONS

BODY: Open 8 skeins. Lay one skein next to the other, matching ends of skeins. Untie knots at ends (lower edge). Cut extra long strands even at lower edge. Using 1 of these extra strands, tie strands loosely at upper edge (top of head). Cut all strands at lower edge. Insert ball, placing tie at center. Spread yarn smoothly to cover ball and tie very tightly 5 inches (12.70 cm)from top of head to form neck.

LEGS: Divide strands evenly into 8 sections and braid. Tie each braid together 2 inches (5.08cm) from end. Trim ends.

BODY: Follow General Directions.

FACE: Following colors as printed on drawings, cut pieces of felt to form face. Make a ½ inch (1.27cm)tuck in ear and tack in place. Spread yarn directly below top of head and pin ears in place. Stuff snoot with cotton batting. Following diagram, pin remaining pieces.

TOP-KNOT: Using No. 10 (6.00mm)knitting needle or any large knitting needle, * wind yarn twice around needle and using a double strand of matching sewing thread, sew with a back-stitch along one edge of needle, repeat from * until piece measures 36 inches (91.44cm)at the sewn edge. Pin top-knot in place. Sew all pieces and top-knot in place. Tie ribbon around neck into a bow.

Lamb Toy Pattern directions
Lamb Toy Pattern chart

Heart Pin Cushion Pattern

Click to go to pdf file.

MATERIALS: J. & P. Coats or Clark’s O.N.T. Best Six Cord Mer­cerized Crochet, Size 30 (Small Ball), 1 ball …

Any size 30 thread should work

Steel Crochet Hook No. 10 (1.30mm)

A metal ring, bit of pink ribbon.

Pattern in US terms.

   Sc closely around ring. Join with sl st to first sc. 

1st row: Ch 3, working in the front loops only of each sc, dc in the same place as sl st, in same sc make dc, ch 2 and 2 dc; ch 3, skip 2 sc, dc in next 25 sc, ch 3, skip 2 sc, in next sc make 2 dc, ch 2 and 2 dc (shell made). Ch 5, turn. 

2nd row: Shell in sp of shell (shell made over shell), ch 3, (dc in next dc, ch 1) 24 times; dc in next dc, ch 3, shell over shell. Ch 5, turn. 

3rd row: Shell over shell, ch 3, skip next sp, sc in next sp, (ch 3, sc in next sp) 23 times; ch 3, shell over shell. Ch 5, turn. 

4th row: Shell over shell, ch 3, skip next sp, sc in next loop, (ch 3, sc in next loop) 22 times; ch 3, shell over shell. Ch 5, turn. 

5th row: Shell over shell, ch 3, skip next sp, sc in next loop, (ch 3, sc in next loop) 21 times; ch 3, shell over shell. Ch 5, turn.

Con­tinue in this manner, having 1 loop less on each row until 1 loop remains. Ch 5, turn. 

Next row: Shell over shell, ch 3, skip next sp, sc in next loop, ch 3, 2 dc in sp of next shell, ch 1, sl st in sp of last shell made, ch 1, 2 dc in same shell where last 2 dc were made, ch 5, turn; sc in joining of last 2 shells. Break off.

   Attach thread to back loop of same sc as first shell was made, work ex­actly as for other side, picking up back loops only.

Lace ribbon through ch-3 sps, joining both sides around cushion. Tie into bow at top.

Pattern in UK terms.

   Dc closely around ring. Join with sl st to first dc. 

1st row: Ch 3, working in the front loops only of each dc, tr in the same place as sl st, in same dc make tr, ch 2 and 2 tr; ch 3, skip 2 dc, tr in next 25 dc, ch 3, skip 2 dc, in next dc make 2 tr, ch 2 and 2 tr (shell made). Ch 5, turn. 

2nd row: Shell in sp of shell (shell made over shell), ch 3, (tr in next tr, ch 1) 24 times; tr in next tr, ch 3, shell over shell. Ch 5, turn. 

3rd row: Shell over shell, ch 3, skip next sp, dc in next sp, (ch 3, dc in next sp) 23 times; ch 3, shell over shell. Ch 5, turn. 

4th row: Shell over shell, ch 3, skip next sp, dc in next loop, (ch 3, dc in next loop) 22 times; ch 3, shell over shell. Ch 5, turn. 

5th row: Shell over shell, ch 3, skip next sp, dc in next loop, (ch 3, dc in next loop) 21 times; ch 3, shell over shell. Ch 5, turn.

Con­tinue in this manner, having 1 loop less on each row until 1 loop remains. Ch 5, turn. 

Next row: Shell over shell, ch 3, skip next sp, dc in next loop, ch 3, 2 tr in sp of next shell, ch 1, sl st in sp of last shell made, ch 1, 2 tr in same shell where last 2 tr were made, ch 5, turn; dc in joining of last 2 shells. Break off.

   Attach thread to back loop of same dc as first shell was made, work ex­actly as for other side, picking up back loops only.

Lace ribbon through ch-3 sps, joining both sides around cushion. Tie into bow at top.

Knit Doll Hat and Scarf 1

Size 2 (2.75mm) needles

Click to go to pdf file

Herrschners 2ply size 2 Afghan Yarn.

I used Light Teal.

My Gauge in Stockinette stitch is 7 stitches and rows to the inch (2.54cm)

Stockinette stitch (knit one row, purl one row)

To help the scarf lay flat, I used selvedge stitches.

Selvedge (slip 1st stitch purlwise, knit last stitch) on every row.

HAT

Cast on 28 stitches.

Rows 1-3 Work rib of knit one purl one for 3 rows.

Rows 4-12 Work in stockinette stitch

Row 13 Knit 2 stitches together across (14 stitches)

Row 14 Purl 2 stitches together across (7 stitches)

Do not cast off. Cut yarn leaving a long strand. Pull that strand through each stitch (pulling stitch off needle) then pull tight to gather. Tie off and finish all loose threads. Sew back seam.

SCARF

Cast on 9 stitches

Row 1 selvedge, knit 7, selvedge

Row 2 selvedge, purl 7 selvedge

Repeat rows 1 and 2 until scarf =11 inches (27.94 cm)

Cast off. Cut thread.

Cut 3 in (cm) pieces of thread and tie on each end of scarf for fringe.

Bird Pattern

Click to go to pdf file.

Materials Required:
AMERICAN THREAD COMPANY
“DAWN” BULKY YARN, Article W-33

2 oz. (56.70 g) White or color of your choice

Any bulky yarn should work.


6 inch (15.24 cm) length medium wire
“Star” Six Strand Mercerized Embroidery Cotton, Article 50
1 skein Yellow for bill

Any Embroidery thread should work.


Pink Sequins for neck, wings and tail.
2 Blue Sequins for eyes

Wind yarn 40 times over a 6 inch (15.24 cm) cardboard.

Tie one end slip from cardboard, tie again about 1 inch (2.54 cm) from 1st tying for head, then tie again 2½ inches (6.35 cm) from last tying for body.

Cut other end for tail.

Comb or brush tail until fluffy.

Stuff body with cotton or yarn.

Sew pink sequins all around neck, then sew sequins in outline of wings as illustrated.

Sew 2 blue sequins in place for eyes.

Thread 4 strands of “Dawn” Bulky through bill section and with “Star” Six Strand Mercerized Embroidery Cotton work ½”  (1.27 cm) in buttonhole stitch over the 4 strands of Bulky to complete bill.

Trim Bulky yarn and embroidery cotton.

Finish by winding “Dawn” Bulky Yarn over wire for feet, and attach in position as illustrated.

Toy Dog knit Pattern

Click to go to pdf file.

Materials: J. & P. Coats Knit-Cro-Sheen, 1 ball.

J. & P. COATS KNIT-CRO-SHEEN

A few suggestions that would work.

Herrschner’s, Aunt Lydia’s, Red Heart, Curio 10,  DMC Babylo size 10, DMC Cebeliz size 10, South Maid,  Knit Cro Sheen Metallic DMC Traditions.

Clark’s O.N.T. or J. & P. Coats Six Strand, 2 skeins for collar and tongue and 1 skein for nose and mouth.  Any embroidery thread should work.

Milward’s Casein knitting pins, 1 pair No. 3 (3 mm. size). 2 glass eyes and cotton batting, 1 box of brass paper fasteners.

A double thread is used throughout.

Starting at tail end, cast on 48 sts. 

1st and 2nd rows: * K 2, p 2, repeat from * across. 

3rd and 4th rows: * P 2, k 2, repeat from * across.

These 4 rows constitute the pattern. Repeat these 4 rows, decreasing 1 st on each row at one side only (this is tail), until 38 sts remain.

Work straight until piece measures 2¼ inches (5.72cm) in all.

Then starting at opposite end from tail, bind off 12 sts (thus shaping leg) and continue across.

Hereafter work in pattern, increasing 1 st at both ends of every 5th row, until there are 34 sts on needle, ending at leg side.

Then cast on 8 sts for other leg, and continue as before, but increasing 1 st at opposite side every 3rd row, until there are 49 sts on needle.

On next row, starting at leg side, bind off 8 sts every other row twice, 4 sts every other row 3 times, and 1 st every row for 3 times.

At the same time, increase 1 st at opposite side each row 12 times in all (30 sts on needle).

Work straight for 3 rows.

To shape head, continue in pattern, increasing 1 st at leg side every other row and decreasing 1 st at opposite side every row, until 24 sts remain.

Then decrease 1 st at both ends of every row until 4 sts remain. Bind off.

Make another piece same as this.

Sew the two pieces together leaving an opening on back edge for stuffing the dog.

Stuff firmly and sew up opening.

Sew eyes in place.

With Six Strand embroider nose and mouth in back stitch. Tack ears together at center.

Tongue: With double thread of Six Strand, cast on 8 sts and work in garter st (k each row), decreasing 1 st at end of each row, until all sts are worked off.

Collar: With same color of Six Strand (double), cast on 5 sts and work in garter st until collar is long enough to go around neck. Bind off, trim collar with brass fasteners, then sew collar in place. Sew tongue under mouth.

Slipper Pin Cushion Pattern

Click to go to pdf file.

J. & P. COATS “KNIT-CRO-SHEEN” METALLIC, Art. A.64: 1 ball of No. M.76 Robinette.

SIZE 10 Lace, Fingering, Bedspread

similar to 0 CYC Lace UK 1ply Australia 2 ply

Dmc Herrschners lists nine colors

Aunt Lydia’s Herrschners lists fifty-four colors, Michael’s lists twenty-six, Walmart lists one

Redheart Michael’s lists five colors, Walmart lists three

Thread Art Walmart list twenty-seven colors

Herrschners Best  Herrschners lists twenty colors.

If you want the glitter, you can also add metallic thread.

The least expensive I’ve found is Coats metallic decorative thread in the sewing thread area at Walmart. It comes in silver and light and dark silver gold.

Just run it along beside the cotton thread when you crochet.


Milwards Steel Crochet Hook No. 6 (1.80mm).
A plastic slipper … 1 large and 1 small sequin and a gold bead.

GAUGE: 8 dc make 1 inch (2.54cm); 3 dc rows make 1 inch (2.54cm).

Pattern in US terms.

SOLE … Starting at center, ch 23. 

1st rnd: Sc in 2nd ch from hook, sc in next 5 ch, dc in next 15 ch, 7 dc in last ch; now, working along op­posite side of starting chain, make dc in next 15 ch, sc in next 6 ch, ch 1. Join. 

2nd rnd: Sc in each sc, and dc in each dc around, making 2 dc, tr and 2 dc in center dc of 7-dc group, ch 23 for heel opening, sl st in first sc. Break off.

TOP … Attach thread to center ch of ch 23. 

1st rnd: Sc in same place, (ch 5, skip 2 ch, sc in next ch) 3 times; ch 5, sc in next sc, (ch 5, skip 2 sts, sc in next st) 8 times; (ch 5, skip 1 st, sc in next st) twice; (ch 5, skip 2 sts, sc in next st) 8 times; (ch 5, skip 2 ch, sc in next ch) 3 times; ch 2, dc in first sc. 

2nd and 3rd rnds: * Ch 5, sc in next loop. Repeat from * around, ending with ch 2, dc in dc. 

4th rnd: Mark off 6 loops across toe, * ch 5, sc in next loop. Repeat from *, ending with sc in first marked loop, ch 2, dc in next 4 loops, ch 2, sc in next loop, com­plete rnd. Join as before. 

5th rnd: * Ch 3, sc in next loop. Repeat from * to within ch-2 sp, (ch 3, sc in ch-2 sp) twice; complete rnd, end­ing with ch 3, sl st in dc. 

6th rnd: 3 sc in each loop around, making 1 sc in the center 3 loops across toe. Join and break off.

HEEL … 1st rnd: Attach thread to first chain of ch-23, sc in same place, sc in each ch around, make 5 sc across straight edge of back. 

2nd rnd: (Ch 5, skip 2 sc, sc in next sc) 8 times; sc in each sc across straight edge. 

3rd, 4th and 5th rnds: Ch 5, skip next loop, sc in next loop, * ch 5, sc in next loop. Repeat from * to within last loop, ch 5, skip last loop, sc in each sc across straight edge. 

6th rnd: * Ch 3, sc in next loop. Repeat from * across loops, sc in each sc. 

7th rnd: 4 sc in each loop, sc in each sc. 

8th rnd: Sc in each sc around. 

9th rnd: Picking up back loop only, * work off 2 sc as 1 sc (twice). Repeat from * around. Now sl st in every other sc until all sc’s have been worked off.

Break off.  Sew sequins and bead to instep. Slip over plastic slipper.

Pattern in UK terms.

SOLE … Starting at center, ch 23. 

1st rnd: Dc in 2nd ch from hook, dc in next 5 ch, tr in next 15 ch, 7 tr in last ch; now, working along op­posite side of starting chain, make tr in next 15 ch, dc in next 6 ch, ch 1. Join. 

2nd rnd: Dc in each dc, and tr in each tr around, making 2 tr, dtr and 2 tr in center tr of 7-tr group, ch 23 for heel opening, sl st in first dc. Break off.

TOP … Attach thread to center ch of ch 23. 

1st rnd: Dc in same place, (ch 5, skip 2 ch, dc in next ch) 3 times; ch 5, dc in next dc, (ch 5, skip 2 sts, dc in next st) 8 times; (ch 5, skip 1 st, dc in next st) twice; (ch 5, skip 2 sts, dc in next st) 8 times; (ch 5, skip 2 ch, dc in next ch) 3 times; ch 2, tr in first dc. 

2nd and 3rd rnds: * Ch 5, dc in next loop. Repeat from * around, ending with ch 2, tr in tr. 

4th rnd: Mark off 6 loops across toe, * ch 5, dc in next loop. Repeat from *, ending with dc in first marked loop, ch 2, tr in next 4 loops, ch 2, dc in next loop, com­plete rnd. Join as before. 

5th rnd: * Ch 3, dc in next loop. Repeat from * to within ch-2 sp, (ch 3, dc in ch-2 sp) twice; complete rnd, end­ing with ch 3, sl st in tr. 

6th rnd: 3 dc in each loop around, making 1 dc in the center 3 loops across toe. Join and break off.

HEEL … 1st rnd: Attach thread to first chain of ch-23, dc in same place, dc in each ch around, make 5 dc across straight edge of back. 

2nd rnd: (Ch 5, skip 2 dc, dc in next dc) 8 times; dc in each dc across straight edge. 

3rd, 4th and 5th rnds: Ch 5, skip next loop, dc in next loop, * ch 5, dc in next loop. Repeat from * to within last loop, ch 5, skip last loop, dc in each dc across straight edge. 

6th rnd: * Ch 3, dc in next loop. Repeat from * across loops, dc in each dc. 

7th rnd: 4 dc in each loop, dc in each dc. 

8th rnd: Dc in each dc around. 

9th rnd: Picking up back loop only, * work off 2 dc as 1 dc (twice). Repeat from * around. Now sl st in every other dc until all dc’s have been worked off.

Break off.  Sew sequins and bead to instep. Slip over plastic slipper.

Quite a Quacker

Click to go to pdf file.

Materials Required:

AMERICAN THREAD

“AUNT LYDlA’S” HEAVY RUG YARN

I’d use one of the below:

CYC 4  Medium worsted weight, UK Aran, Australia 10ply

Bernat Happy Holidays

Red Heart Holiday

Red Heart Knitted Worsted

Caron Simply Soft

2 — 70 Yd. Skeins White

1- 70 Yd. Skein Bongo

Aluminum Crochet Hook Size H (5MM) OR ANY

SIZE HOOK WHICH WILL RESULT IN

STITCH GAUGE/TENSION BELOW

Kapok or Shredded Foam Rubber for filling

2 Buttons

GAUGE: 3 sts : 1 inch (2.54cm)

Pattern in US terms.

BODY: With White ch 16, 1 sc in 2nd st from hook and in each remaining st of ch,

ch 1 to turn all rows.

NEXT 3 ROWS:

Working in sc inc 1 sc at beg and end of each row.

5th ROW: Inc 1 sc at beg of row.

6th ROW: Inc 1 sc at beg and end of row. Repeat last 2 rows once (27 sc).

NEXT 6 ROWS: Work even in sc.

15th ROW: Dec 1 sc at end of row (to dec: insert hook in st, pull loop through, insert hook in next st, pull loop through, yarn over and work off all loops at one time).

16th ROW: Dec 1 sc at beg of row.

17th ROW: Repeat 15th row.

18th ROW: (START HEAD): Dec 1 sc at beg of row, 1 sc in each of the next

7 sc, ch 1, turn.

19th ROW: Inc 1 sc at beg of row.

NEXT 3 ROWS: Inc 1 st at beg and end of each row (15 sc).

NEXT 4 ROWS: Work even.

27th ROW: Dec 1 st at beg of row.

28th ROW: Dec 1 sc at beg and end of row.

Repeat last 2 rows once.

31st ROW: Repeat 28th row, cut yarn, turn.

Attach yarn in last st worked in of 17th row, 1 sc in each of the next 15 sts.

NEXT ROW: 1 sc in each of the 1st 3 sc, sl st in each of the next 4 sc, 1 sc in each of the next 7 sc, sl st in next st.

NEXT ROW: Skip the sl st, 1 sc in each of the next 7 sts, sl st in each of the next 4 sts, 1 sc in each of the next 3 sts.

NEXT ROW: 1 sc in each of the 1st 3 sc, sl st in next st, ch 1, turn.

NEXT ROW: Skip the sl st, 1 sc in each of the next 2 sc, 2 sc in next sc.

NEXT ROW: Sc in 1st sc, skip next sc, sc in next sc, sl st in next st, cut yarn. Work another section in same manner.

WINGS: (MAKE 2): With White ch 7, 2 sc in 2nd st from hook, 1 sc in

each of the next 4 sts of ch, 2 sc in next st, ch 1 to turn all rows.

2nd ROW: Working in sc, inc 1 sc at beg and end of row.

3rd ROW: Inc 1 sc at end of row.

4th ROW: 1 sc in each sc.

5th ROW: 2 sc in 1st sc, sc in next sc, sl st in each of the next 3 sc,1 sc in each of the next 6 sc.

6th ROW: Dec in 1st 2 sc, 1 sc in each of the next 3 sts, sl st in each of the next 4 sts, sc in next st, dec in next 2 sts, cut yarn.

INSERT: With White, ch 2, 3 sc in 2nd st from hook, ch 1 to turn all rows.

NEXT 6 ROWS: Work in sc inc 1 st at beg of each row.

NEXT ROW: Work even in sc.

NEXT 6 ROWS: Work in sc dec 1 st at beg of each row.

NEXT ROW: * Insert hook in next st, pull through, repeat from * twice, yarn

over and pull through all loops, cut yarn.

BEAK: With Bongo ch 2, sc in 2nd st from hook, ch 1 to turn all rows.

2nd and 3rd ROWS: Working in sc inc 1 st at beg of each row.

4th ROW: 1 sc in each st (4 sc).

5th ROW: 2 sc in 1st st, sl st in each of next 2 sts, 2 sc in last st.

6th ROW: 1 sc in each of first

Pattern in UK terms.

BODY: With White ch 16, 1 dc in 2nd st from hook and in each remaining st of ch,

ch 1 to turn all rows.

NEXT 3 ROWS:

Working in dc inc 1 dc at beg and end of each row.

5th ROW: Inc 1 dc at beg of row.

6th ROW: Inc 1 dc at beg and end of row. Repeat last 2 rows once (27 dc).

NEXT 6 ROWS: Work even in dc.

15th ROW: Dec 1 dc at end of row (to dec: insert hook in st, pull loop through, insert hook in next st, pull loop through, yarn over and work off all loops at one time).

16th ROW: Dec 1 dc at beg of row.

17th ROW: Repeat 15th row.

18th ROW: (START HEAD): Dec 1 dc at beg of row, 1 dc in each of the next

7 dc, ch 1, turn.

19th ROW: Inc 1 dc at beg of row.

NEXT 3 ROWS: Inc 1 st at beg and end of each row (15 dc).

NEXT 4 ROWS: Work even.

27th ROW: Dec 1 st at beg of row.

28th ROW: Dec 1 dc at beg and end of row.

Repeat last 2 rows once.

31st ROW: Repeat 28th row, cut yarn, turn.

Attach yarn in last st worked in of 17th row, 1 dc in each of the next 15 sts.

NEXT ROW: 1 dc in each of the 1st 3 dc, sl st in each of the next 4 dc, 1 dc in each of the next 7 dc, sl st in next st.

NEXT ROW: Skip the sl st, 1 dc in each of the next 7 sts, sl st in each of the next 4 sts, 1 dc in each of the next 3 sts.

NEXT ROW: 1 dc in each of the 1st 3 dc, sl st in next st, ch 1, turn.

NEXT ROW: Skip the sl st, 1 dc in each of the next 2 dc, 2 dc in next dc.

NEXT ROW: Dc in 1st dc, skip next dc, dc in next dc, sl st in next st, cut yarn. Work another section in same manner.

WINGS: (MAKE 2): With White ch 7, 2 dc in 2nd st from hook, 1 dc in

each of the next 4 sts of ch, 2 dc in next st, ch 1 to turn all rows.

2nd ROW: Working in dc, inc 1 dc at beg and end of row.

3rd ROW: Inc 1 dc at end of row.

4th ROW: 1 dc in each dc.

5th ROW: 2 dc in 1st dc, dc in next dc, sl st in each of the next 3 dc,1 dc in each of the next 6 dc.

6th ROW: Dec in 1st 2 dc, 1 dc in each of the next 3 sts, sl st in each of the next 4 sts, dc in next st, dec in next 2 sts, cut yarn.

INSERT: With White, ch 2, 3 dc in 2nd st from hook, ch 1 to turn all rows.

NEXT 6 ROWS: Work in dc inc 1 st at beg of each row.

NEXT ROW: Work even in dc.

NEXT 6 ROWS: Work in dc dec 1 st at beg of each row.

NEXT ROW: * Insert hook in next st, pull through, repeat from * twice, yarn

over and pull through all loops, cut yarn.

BEAK: With Bongo ch 2, dc in 2nd st from hook, ch 1 to turn all rows.

2nd and 3rd ROWS: Working in dc inc 1 st at beg of each row.

4th ROW: 1 dc in each st (4 dc).

5th ROW: 2 dc in 1st st, sl st in each of next 2 sts, 2 dc in last st.

6th ROW: 1 dc in each of first

Kelly Slip Pattern US Terms


             Click to go to pdf file

This will be tight and sit below the waist. Adjust your original chain to fit.

             Row 1. Ch 18 join to form loop.

             Row 2. Ch 1, 18 sc in loop, join.

             Row 3. Ch 4, 2 tr in each sc around, join.

             Row 4. Ch 4, (1 tr in next stitch, 2 tr in next stitch) around, join.

             Row 5. Ch 4, tr around, join.

             Start Ruffle. I put a bobby pin at the start of each row so I don’t lose my place.

             Row 6. Ch 1, sc in join, (chain 5 sc in next loop) around, join with ch 3, dc in join sc.

             Row 7. Ch 1, sc in join, (chain 5 sc in next loop) around, join with ch 3, dc in dc.

             Row 8. Ch 1, sc in join, (chain 5 sc in next loop) around, join with ch 3, dc in dc.

             Row 9. Ch 1, sc in join, (chain 5 sc in next loop) around, join with ch 3, dc in dc.

             Row 10. Ch 1, sc in join, (chain 5 sc in next loop) around, join in dc. Cut thread.

  Slip Pattern UK Terms


            This will be tight and sit below the waist. Adjust your original chain to fit.

             Row 1. Ch 18 join to form loop.

             Row 2. Ch 4, 18 dtr in loop, join.

             Row 3. Ch 4, 2 dtr in each dtr around, join.

             Row 4. Ch 4, (1dtr in next stitch, 2 dtr in next stitch) around, join.

             Row 5. Ch 4, dtr around, join.

             Start Ruffle. I put a bobby pin at the start of each row so I don’t lose my place.

             Row 6. Ch1, dc in join, (chain 5 dc in next loop) around, join with ch 3, tr in dc.

             Row 7. Ch1, dc in join, (chain 5 dc in next loop) around, join with ch 3, tr in tr.

             Row 8. Ch1, dc in join, (chain 5 dc in next loop) around, join with ch 3, tr in tr.

             Row 9. Ch1, dc in join, (chain 5 dc in next loop) around, join with ch 3, tr in tr.

             Row 10. Ch1, dc in join, (chain 5 dc in next loop) around, ch 3 join in tr. Cut thread.


Pin Cushion Doll Pattern

Click to go to pdf file

REQUIREMENTS:
THREAD: 250-yards #30 Mercerizedcrochet Cotton
CROCHET HOOK: 1 steel No. 9
RIBBON: ½-yd. of 4-inch satin for slip
2-yds. narrow ribbon
8-inch Character Doll
1-piece of cotton batting 8″ x 6″.

   SKIRT: Starting at the bottom of skirt, make a chain of 48 sts, turn; 1 dc in 3rd st from hook, 1 dc in each remaining chain (46 dc). Ch 6, turn. 

2nd row: 1 dc in first dc, * ch 1, dc in next st; repeat from * across row, ending with 1 dc in last st. Ch 3, turn. 

3rd-4th-5th rows: 1 dc in first space, ch 1, 2 dc in same space; * ch 1, skip 1 space, in next space make a shell — 2 dc, ch 1, 2 dc; repeat from * across row (23 shells). Ch 3, turn. 

6th row: 1 dc in first space, ch 1, 2 dc in same space, * ch 1, 1 dc in next space, ch 1, make a shell over shell; repeat from * across ending with a shell. Ch 3, turn. 

7th row: 1 dc in first space, ch 1, 2 dc in same space, * ch 1, 1 dc in next dc, ch 1, make a shell over shell; repeat from * across row ending with a shell. 

8th to the 20th rows inclusive: Repeat 7th row. (Piece measures approx. 5 inches). Ch 3, turn. 

21st row: Make 2 dc in first shell, * 1 sc in next dc, 3 dc in next shell; repeat from * across row ending with 3 dc in last shell. Ch 3, turn. 

22nd row: 1 dc in 2nd dc, * 1 dc in sc, 1 dc in center of 3-dc group on row below; repeat from * across row. Ch 3, turn. 

23rd row: 1 dc in each st across row. Break thread and fasten off. Cut two lengths of narrow ribbon a ½-yard long. Weave a piece through the last row of dc. Do the same at bottom of skirt.

   HALTER: Ch 12 sts, turn, 1 dc in 3rd st from hook, 1 dc in each remaining chain (10 dc). Ch 3, turn. 

2nd row: 1 dc in each st across row. Repeat 2nd row until the 20th row has been completed (about 4 inches). Continuing on length of halter, make 1 sc over side of dc, * ch 3, 1 sc on side of next dc; repeat from * across (19 loops). Ch 3, turn. 

Next row: 3 dc in first loop, * 1 sc in next loop, 4 dc in next loop; repeat from * across row. Break thread. Tie thread at other long side of halter and work 1 row of loops. Break thread.

   HAT: Ch 4, join to form a ring. 

1st rd: Ch 3, 13 dc into ring (14 sts). Join rd and every round hereafter. 

2nd rd: Ch 3, 1 dc in same space, 2 dc in each st round (28 sts). 

3rd rd: Ch 3, * 2 dc in next st, 1 dc in next st; repeat from * around once (42 sts). 

4th rd: Ch 3, 1 dc in next 12 sts, 2 dc in each of the next 16 sts, 1 dc in last 13 sts. 

5th rd: Ch 3, 1 dc in next 12 sts, * make a shell in space between the next 2-dc group; repeat from * 15 times more; 1 dc in last 13 sts. 

6th rd: Ch 3, repeat 5th round having ch 1 between each shell. 

Last rd: Ch 1, 1 sc in first 12 sts, * ch 3, sc in next space, ch 3, sc in center of shell; repeat from * to last shell, ch 3, 1 sc in last 13 sts. Join rd. Break thread. Fasten off.

   POUCH: Follow first 2 rounds of hat. 

3rd rd: Ch 3, 1 dc in each st around. Join rd.

Repeat last round 3 times more. 

7th rd: Ch 3, 2 dc in each st around. Join rd. Chain 10 sts, join at opposite side to form a handle. Break thread and fasten off. Run a piece of thread through 6th round, draw tightly and fasten off.

   FINISHING: Foldcotton batting 3 inches under on the 8 inch side; wrap around doll, having the fold at bottom. Seam the piece of 4-inch ribbon. Run a gathering thread at top and bottom of ribbon. Place over cotton batting and draw tightly, fasten off. Gather crocheted skirt over this and tie in bow at back. Place halter onto doll. Sew up back. Finish off with ribbon as in illustratio